RSS

Blog posts tagged with 'sprayer'

How to Size a Sprayer Pump: Flow, Pressure, and Pump Type Explained
(0) How to Size a Sprayer Pump: Flow, Pressure, and Pump Type Explained

Pump “size” can mean a lot of different things: Flow rate, port size, horse power required, or just how much space does the sucker take up! So when you are looking for a sprayer pump, you must consider several factors. But don’t worry, it is not complicated, and this article will provide the answers you need. 


Key Takeaways (TL;DR): Sizing a Sprayer Pump

Don’t just guess when picking a sprayer pump. Start by figuring out your flow rate (nozzles × GPM), then add 25–30% to handle things like pressure loss, agitation, and future upgrades. Make sure your pump can handle the pressure too—tree spraying needs way more PSI than a spot sprayer. Whether you’re running a boom sprayer, de-icer, or handgun rig, matching the pump to your setup means better performance, less wear, and fewer surprises in the field.


Identify Your Sprayer Type

First, you need to understand the needs of the specific type of sprayer you’re using—whether it's for tree spraying, agriculture, de-icing, or anything else—this is the first step. Sprayer type will inform you of the pump type you will need, as well as both the pressure and flow rate that is required. After all, not all sprayers will require the same fluid and pressure output. 

Typical Flow & PSI Requirements for Different Sprayer Pump Types:

Sprayer Type

Flow Range (GPM)

Pressure Range (PSI)

Boom Sprayer

1-100

15-120

Boomless Sprayers

3-100

20-60

Spot Sprayers

1-5

15-60

Tree Sprayers

10-50

150-700

De-Ice Sprayer

50-200

15-60

These amounts are general ranges for common sprayers and can vary. For a detailed breakdown, you can refer to our guide on the different types of sprayer pumps.


Calculate the Required Flow Rate

Once you know what type of pump you will need for your sprayer, you can then determine the size of the pump in regard to flow rate. To determine the required flow rate, you need to know some pieces of information. These pieces of information will vary slightly, depending on the type of sprayer, which again is why you start by determining what sprayer type you have.


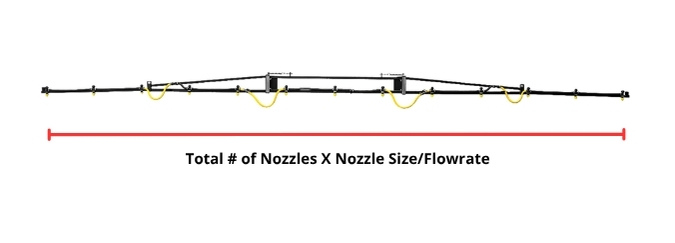
Calculating Flow Rate for a Boom Sprayer

Flow requirements for your sprayer boom depend upon both the number of nozzles on the boom and the size of the nozzles. Once you identify the size of each nozzle or the flow rate per minute of each nozzle, you need to take that flow rate and multiply it by the total number of spray nozzles.  

number of nozzles on sprayer boom

Boom sprayer nozzles typically follow a color code. This will tell you the nozzle flow rate at various PSI. You will want to use the nozzle flow rate at the higher end of its operating pressure range. If you don’t yet have your nozzles sized or are uncertain what size nozzles you have, this guide will show you how to identify nozzle sizes. Then you can examine the nozzle chart for flow rates a various PSI.

If you have a “boomless” sprayer, the process is no different, although you may only have one or two nozzles. Likewise, a spot sprayer or spray rig with a single spray gun would only have one nozzle to account for.

Example Calculating Required Sprayer Boom Flow Rate:

Let's look at an example: if your sprayer boom has 18 nozzles that have a flow capacity of 0.4 GPM (gallons per minute), you will take 0.4 x 18. This gives us 7.2 gallons per minute. So we need a pump that is capable of delivering this flow rate; however, we are not done yet. We still need to examine some other factors.


Account for Pressure Increase

Multiplying the number of nozzles by their GPM capacity gets us started — but that alone often isn’t enough. Here's why we will need to consider more than just flow:

Extra Capacity for Increases in Travel Speed

If you speed up in the field but don’t change your nozzles, your sprayer must push more liquid through them to maintain the same application rate (gallons per acre). That means your system needs a higher flow rate — and your pump has to keep up. If the pump is undersized, pressure will drop, coverage may become uneven, and application rates may fall below label requirements.

Higher Application Rates = Higher Flow Demand

What if you need to apply a higher application rate in the future (GPA)? This will either require more pressure or a slower travel speed. However, this limits the sprayer. You can only increase pressure or decrease speed so much before needing to swap out your nozzles for larger ones.

Larger nozzles will directly increase how much fluid the pump must deliver. If you change nozzles to increase your rate, you won’t want to need to change out your pump as well. Account for this upfront, and you can be confident your sprayer will handle any future jobs.


ag boom sprayer


Account for System Losses and Bypass

Don’t forget that sprayer systems often use bypass regulators or agitation systems that recirculate fluid back to the tank. This “extra” flow also comes from the pump and needs to be accounted for.

A good rule of thumb: add 20–30% over your calculated nozzle GPM to accommodate system losses and agitation. Do note, if you use the same sprayer for two or three applications that require very different flow rates, figure 20-30% above the job that demands the highest flow rate. 

Now, this is a rule of thumb. The best route is to research the nozzles, the agitation jets, rinse nozzles, bypass valves, etc. Understanding the flow requirements for the boom as well as all the other accessories on the sprayer, will help to ensure you pick a large enough pump without unnecessarily oversizing it. 


Pump Type: Determine Pressure Required

The other half of sprayer pump performance to consider is pressure. The flow requirement tells us the output we need from the pump; however, the pressure required will tell you the type of pump you need. 

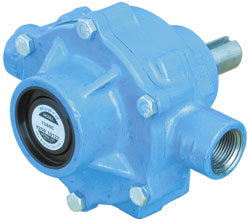
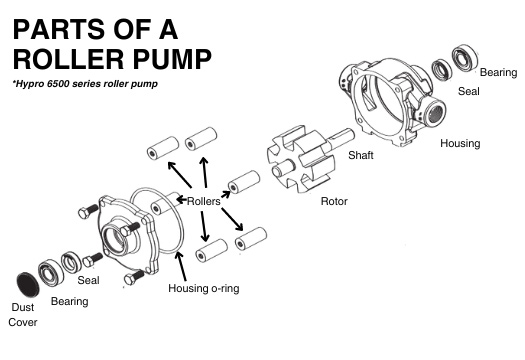
Boom sprayers and spot sprayers are going to be considered low-pressure applications. This would be about 15-120 PSI. Centrifugal pumps, roller pumps, and 12V diaphragm pumps will meet this requirement. 

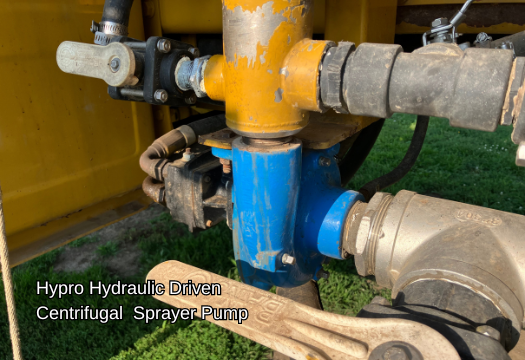
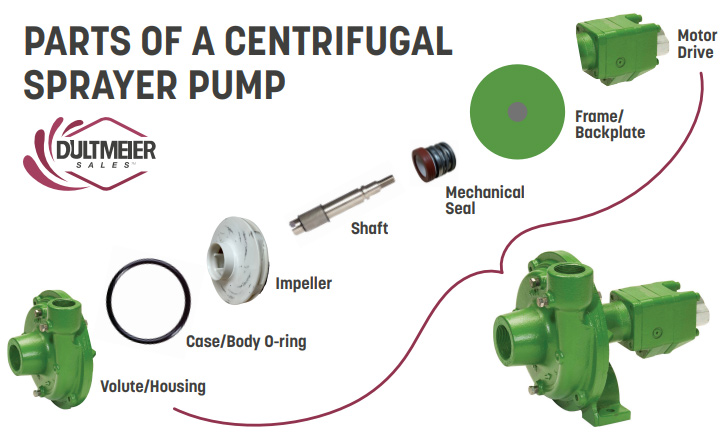
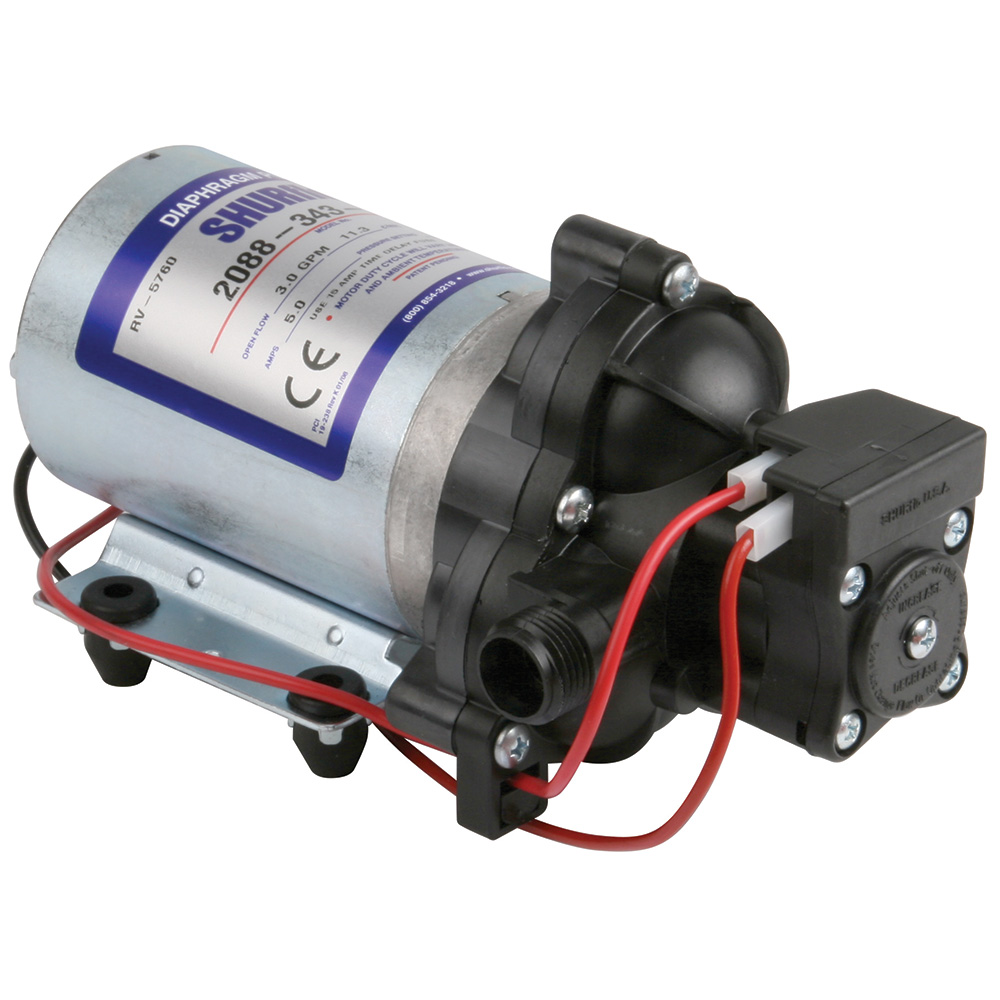
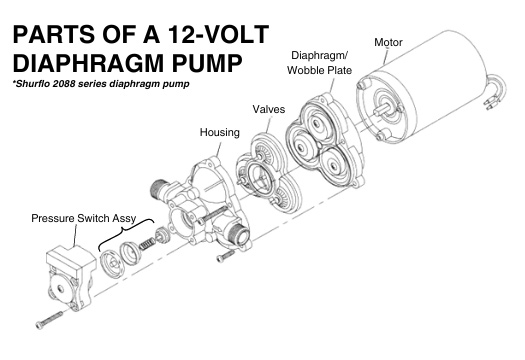
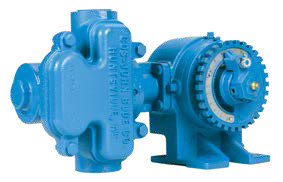
Centrifugal pumps offer the highest volume. They are very common on larger agricultural boom sprayers as well as de-ice sprayers. 12V diaphragm pumps are used solely for low-volume applications such as small boom sprayers and spot sprayers. 

Sprayers where you need to reach a great distance with a spray gun will require more pressure. This is especially important for reaching tall trees. Engine-driven diaphragm pumps offer not only the flow but also the high pressure required to spray fluid 40-50 feet or even more. Typically reaching a pressure of 500 PSI or more.  


Our sprayer pump guide will break down each of these pump types in greater detail and offer you specific examples of each pump type for various applications.


Specific Sprayer Pump Sizing Examples

Let’s look at a few real-world examples to show how pump sizing works in practice:

Pull-Type Boom Sprayer Pump Sizing

Scenario:

  • Fifty-foot wide boom with 30 nozzles
  • Plan to spray 10 GPA rate at about 6 MPH
  • Nozzle size required: Yellow nozzle = 0.2 GPM @ 40 PSI.

Step 1: Calculate total nozzle output
30 nozzles × 0.2 GPM = 6 GPM

Step 2: Add margin for system demands
6 GPM × 1.3 (buffer for agitation, speed fluctuation, etc.) = ~7.8 GPM

Step 3: Consider an increase in rate or speed
15 GPA rate at the same speed would require 0.3 gallons per minute per nozzle. This can be achieved with the same nozzles at higher pressure or with a larger nozzle (Blue nozzle = 0.3 GPM at 40 PSI). 

  • 30 nozzles x 0.3 GPM = 9 GPM.  9GPM x 1.3 buffer = 11.7 GPM. 

Pump Recommendation: A Pump capable of 12 GPM at normal operating speed would work for these scenarios. Most agricultural sprayers use centrifugal pumps, and these are easily going to produce this amount, often much more. This would make the sprayer very versatile for higher volumes, such as applying fertilizer.


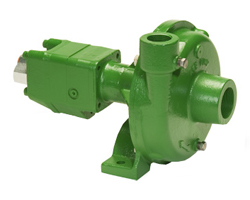
Examples: Ace FMC-HYD-204


Tree Spray Rig Pump Sizing 

Scenario:

  • High-pressure tree spraying with a hand gun
  • Spraying trees 40-45 ft tall
  • Required GPM: 10
  • Required PSI: 500

Step 1: Calculate total output
1 × 10 GPM = 10 GPM

Step 2: Add buffer for pressure loss and surge
10 GPM × 1.3 = ~13 GPM

Recommended Pump: 12–15 GPM diaphragm pump capable of 500+ PSI.


Examples: Udor Kappa 55, - AR503, - AR50


Spot Sprayer Pump Sizing

Scenario:

  • Small ATV sprayer
  • Handgun use only
  • Nozzle uses 0.5 GPM at 40 PSI

Step 1: Total output = 0.5 GPM
Step 2: Add a small buffer for pressure regulation
0.5 x 1.3 = ~.65 GPM

Recommended Pump Size: 1.8 GPM 12-volt diaphragm pump. There are 12V pumps that are lower in flow and cost; however, they are limited in pressure and may not provide the spray distance you need. So in this case, we over-size the pump slightly to ensure it performs. 


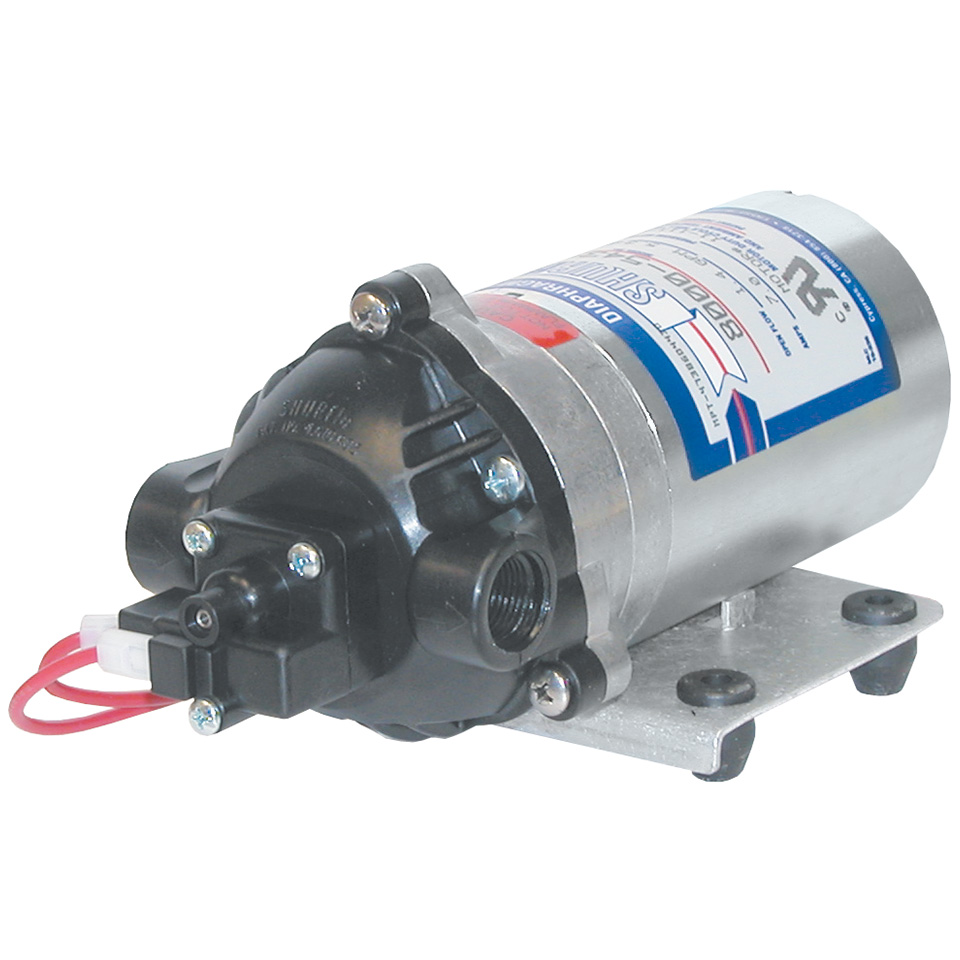
Example: Shurflo 8000-543-236


Conclusion

Getting the right size pump for your sprayer isn’t just about performance—it helps your equipment last longer and work more efficiently. When you take the time to calculate your flow rate, consider your pressure needs, and match it all to the right pump type, you’ll set yourself up for reliable, consistent spraying. A little planning up front goes a long way in making sure your sprayer does its job without headaches.


Shane Blomendahl, Author

Tech Ag & Industrial Sales

Shane Blomendahl is a tech sales veteran at Dultmeier Sales with over 10+ years of experience in liquid handling products covering several industries and applications.

Learn More About the Author

TeeJet Nozzle Charts: Find the Right Spray Tip for Your Application
(0) TeeJet Nozzle Charts: Find the Right Spray Tip for Your Application

TeeJet offers a wide range of sprayer nozzles, each designed for specific applications, including herbicides, fungicides, fertilizers, and more. Selecting the right one is vital; that's why the TeeJet nozzle charts are so important. 

These nozzle charts will show the flow rates, pressure ranges, and droplet sizes produced by a given TeeJet nozzle. Depending on the nozzle type, it may also show the gallon per acre rates that the nozzle can provide at various travel speeds and nozzle spacings. 

Whether you're looking at the XR Extended Range, AIXR air induction, TT Turbo TeeJet, or TTI low-drift series, we have the specific TeeJet spray nozzle chart you need to determine the correct type and nozzle capacity you need. 

Access Charts for Various TeeJet Nozzles

Use the interactive tool below to access the exact TeeJet nozzle chart PDF for your spray tip. Whether you're calibrating for herbicides, fungicides, or fertilizers, this tool helps you match your nozzle type with its official chart so you can get precise flow rates, droplet sizes, spray angles, and operating pressures.


TeeJet Nozzle Chart Tool


Note: some of the links to chart PDFs have more than one nozzle chart on them, and you may need to scroll down. 

How It Works:

  1. Select your TeeJet nozzle type from the dropdown menu.

  2. Instantly view the chart as an image or access the TeeJet nozzle chart PDF.

  3. Click through to purchase either the spray tip only or a complete tip/cap/gasket assembly—all directly from Dultmeier.com.

Supported Nozzle Types:

You can view charts and shop parts for the following TeeJet nozzles:

This tool is a fast and easy way to locate accurate spray data without flipping through a catalog. Whether you're in the shop, in the cab, or out in the field, pull up the TeeJet nozzle chart PDF for your tip and make informed spraying decisions in seconds.


How to Read a TeeJet Nozzle Chart

Each TeeJet nozzle chart includes several key pieces of information to help you select the right spray tip for your application. Here's what each one means:

  • Tip Number (e.g., XR11002): This identifies the nozzle type, spray angle, and flow rate. For example, “XR” stands for Extended Range, “110” is the spray angle in degrees, and “02” refers to the flow rate size. You can learn more about nozzle numbers and color codes in this guide.

  • PSI Range: The recommended pressure range (in pounds per square inch) for optimal performance. Staying within this range will ensure that you maintain the spray pattern and get adequate coverage and droplet size.

  • GPM Flow Rate: Gallons per minute the nozzle delivers at specific pressures. This is critical for calibration and ensures you're applying the correct volume. If you need a refresher on nozzle sizing, be sure to read this article, where we break down the formula for sizing nozzles.

  • Droplet Size Category: Indicates the size of the spray droplets—such as Fine, Medium, Coarse, or Extremely Coarse—which affects coverage, drift potential, and suitability for different chemicals. 


Spray Nozzle Selection

If you're still exploring which nozzle is best for your application, be sure to check out our TeeJet Spray Nozzles overview. That guide breaks down the different nozzle types we carry, what each one is designed for, and how they compare—making it a great companion to the nozzle chart tool on this page.


Ag Chemical Mixing System: Handling Mini-Bulk Chemical Without 12-Volt Pumps
(0) Ag Chemical Mixing System: Handling Mini-Bulk Chemical Without 12-Volt Pumps

Chemical mixing is a crucial part of agricultural spraying. Regardless of the type of herbicide, fertilizer, or biologic you use, effective mixing requires proper equipment to ensure precision, safety, and minimize waste.

The main tool to add mini-bulk chemicals is typically a 12-volt diaphragm pump and electronic meter. However, what if I told you there was a way to mix all your bulk chemicals without multiple 12-volt pumps? Let’s look at the pros and cons of the different options and explain how you can use one pump and meter for multiple products without recalibration or disconnecting and connecting hoses.

Chemical Mixing With 12-Volt Pump and Meters: The Good and the Bad 

Anyone mixing chemical batches for a sprayer is likely familiar with 12-volt chemical pumps and meters. These are necessary to add products to your sprayer batches either directly or through an inductor cone. These pumps are effective, but they have several drawbacks including maintenance, limited flow, and of course cost. 

This method also limits your efficiency because you must calibrate multiple meters and add product one at a time carefully watching the meter until you have added your desired amount. You must shut off the valve, and pump, and then move on to the next product. There is also the constant handling of the hoses and meters, moving them around as needed, which can get messy. 

More sophisticated systems, such as the Dura Auto Batch System, allow you to inject each product directly, eliminating the need to handle each one. They will even allow you to set the amount of product you want and automatically shut off the pump once that amount has been reached. 


Dura Auto-Batch System with Dura Meter


This method definitely works well, and it is much more efficient. However, it does come with added cost and you still have the potential for pump and meter failure due to the nature of handling agrochemicals. 

There are also automated systems to mix your chemicals without 12-volt pumps and meters. These provide the most streamlined option but they are by far the most expensive. The idea of being able to efficiently add chemicals while accurately measuring them without multiple 12-volt pumps and meters is certainly appealing, but how can you accomplish this without spending thousands if not tens of thousands?  

The good news is that with the right transfer pump for the carrier liquid, meter, and inductor setup, this can be done!


Ag Chemical Mixing Setup Without 12-Volt Pumps

How exactly will one pump handle all the chemicals or additives? Instead of a 12-volt pump on each chemical tote, you can use the suction from a Venturi/inductor to pull product from each tote. This is the same type of inductor assembly that you would find under a cone bottom tank. (If you are not familiar with inductor tanks with a venturi, our guide on chemical inductors will get you up to speed.) 


Dultmeier's Tank Eductor, Part No. DU1A15XL


In the following setup, instead of a cone bottom tank, we have a manifold stacked on top of a gear meter that can measure each product accurately. Each product is drawn into the manifold and through the meter, then feeds into your main carrier line into the sprayer or nurse tank. 

Dultmeier quick chemical mixing system

Everything is plumbed together allowing you to add each chemical one at a time. You simply open the corresponding ball valve for the product you want to add and watch the flow meter display until the desired volume is reached. Then close the valve, open the rinse valve to flush the system, and reset the meter before moving on to the next product.

There are a couple of important aspects of this setup that make it work: 1) the gear meter handles all the chemicals without the need for recalibration, and 2) suction is needed to pull chemical from each tank. 

The meter is pretty straightforward, you must ensure you are using a meter that can handle the different agrochemical viscosities. For this, an oval gear meter is required. It is the suction aspect that gets a little more tricky. 

There are two distinct ways one can generate the required suction: You can use the suction from your transfer pump (typically a 2 or 3-inch gas-engine driven pump) or you can use suction from an inductor. These two methods can effectively be used to move your bulk chemical but there are key plumbing differences for each one. 

Dultmeier sales offer prebuilt units that work with either method. We will examine those later in this article, but first, let’s walk through the differences between each one and consider the pros and cons of each.

Option #1: Using Suction of Your Transfer Pump

The simpler of the two methods is to use the suction created by your transfer pump. The pump is installed in your main carrier/water line. Each hose from your mini-bulk tanks is plumbed into a manifold. The outlet of the manifold is connected via a “T” fitting into your carrier line. All of the liquid, chemical, and water, is pulled through the pump and into the sprayer or nurse tank.

ag chemical mixing using pump suction

*Using the suction of a centrifugal pump to pull chemicals from the shuttle/mini-bulk tanks.


Required Components

  • 2-inch or 3-inch Engine driven Centrifugal Pump (Preferably a “Wet Seal” Pump)
  • Oval Gear Meter
  • Flow Meter Display
  • Poly “Tee” Fittings for manifold
  • Ball Valves
  • Hose
  • Check valve

Advantages of using suction from your pump

  • Lower overall cost
  • Simple to setup
  • Amount of chemicals you can add is not limited by the volume of the carrier that is pumped

Disadvantages of using suction from the pump

  • All the chemical goes through the pump, potentially causing pump damage over time
  • Potential to introduce air in the pump or starve the pump of liquid, resulting in seal failure
  • Cannot use the pump to provide fresh water for rinse


Option #2: Using Venturi/Inductor System

The second method to draw your chemical into your system with your transfer pump is to utilize a venturi. The pump pushes the water/carrier through the venturi and this creates suction that can pull chemicals from the mini-bulk tanks and into your manifold then through the venturi. In this setup, there is no chemical going through the pump. 

The suction is created by the venturi and the venturi is located on the discharge side of the pump. The pump can also provide rinse water because it is just pumping fresh water and not chemicals. 

This would be a great option if you are already using a cone bottom mixing tank with an inductor venturi manifold on the bottom. You can plumb your chemical manifold into the bottom of your existing inductor cone. This will allow you to use the inductor assembly to suck product out of the cone bottom tank or your chemical manifold. 


Dultmeier's Chem Mix System shown with inductor and venturi

*Using suction created from water pumped through inductor assembly to pull chemical from shuttle/mini-bulk tanks.


Required Components

  • 2-inch or 3-inch Engine driven Centrifugal Pump (Preferably a “Wet Seal” Pump)
  • Inductor System with 2 or 3-inch Venturi Manifold
  • Oval Gear Meter
  • Flow Meter Display
  • Poly “Tee” Fittings for manifold
  • Ball Valves
  • Hose
  • Check valve

Advantages of using inductor assembly for suction:

  • Only one pump is needed to create suction and provide rinse
  • No chemical through the transfer pump
  • No risk of starving the pump

Disadvantages

  • More components required means more cost


How to Construct Chemical Mixing Manifold

The central feature of this setup is building your manifold so your transfer pump can be used to pull chemical into the system and meter it accurately. This means we need a “stack” of “tee” fittings on top of a meter with a freshwater line plumbed into the top. It is recommended that a strainer is installed prior to the meter to protect it from debris. 

No matter which of these methods you choose, there are a few key aspects to keep in mind to ensure your system operates effectively. 

Pump Type

First off, the type of pump that you use matters. You can use a two- or three-inch pump. If your main carrier/water line is two inches, then use a two-inch pump. You need a three-inch pump if you want to use a three-inch line. It is important to ensure the pump has adequate horsepower to handle the demands of this application. Typically, this means 5 HP for a 2-inch pump and 9 or more HP for a 3-inch pump. Be sure to contact us if you need help identifying the right pump.

This is especially important if you are using an inductor with venturi. Your pump must meet the flow rate requirements for the inductor assembly to perform adequately. A two-inch pump used with a three-inch venturi assembly will not generate enough flow through the venturi to create the suction needed to pull products out of the cage tank/mini-bulk tank. 

Furthermore, it is recommended that you use a centrifugal transfer pump with a “wet seal”. This type of seal can be run dry for short periods of time without causing any damage to the seal assembly. This is especially significant If you plan to use the suction of the pump to pull product from each tote. You don’t want to risk damaging the pump if a tank runs empty and the pump starts pulling air. 

Plumbing

The hoses from the mini-bulk tanks/shuttles to the inlet of the manifold should be kept as short as possible. The suction of the pump is capable of pulling chemicals from about 20 feet with no problem but there is a limit. It is best practice to limit excess hose length, elbows, and other restrictions as much as possible so the system works efficiently. 

Meter

Using one meter for all of your products requires a meter that does not need to be calibrated for each product and can handle liquids with different viscosities. An oval gear meter is capable of providing consistent measurements of flow rates for both high- and low-viscosity liquids

You can use a meter with a local display to monitor the amount of chemical as it is added. This may be hard see because the meter is located on the bottom of the manifold. GPI offers a meter with a remote display option that can be mounted anywhere that is more convenient to see as you mix your chemicals.


Meter with Remote Display

Check Valve

A check valve is necessary to prevent any chemical or carrier flowing back into the manifold. This is installed between the meter and a “Tee” fitting in the main water line. 

Manifold Flange Fittings

Banjo manifold flange fittings are a style of plumbing connection that is much easier to work with than threaded fittings. These fittings are connected via a clamp and a gasket that provides a seal between the two flanges. Using these fittings saves a lot of time in the assembly and disassembly process. A single fitting can be isolated and removed/replaced without the need to unthread an entire group of fittings.

Rinse 

A feature that should not be overlooked. The rinse valve on the top of the manifold/stack ensures that all of the product is flushed out before adding another. The rinse line can be plumbed in a number of ways. The rinse plumbing will vary depending on whether you are using the pump suction or a venturi.

If you are using the suction of the pump (without a venturi/inductor assembly), then you will require a second pump to supply fresh water to rinse out the system.


Prebuilt Chemical Mix Unit: Quick Chem-Mix

Assembling one of these units can be done fairly easily. You can configure it to work with your current chemical mixing station or sprayer nurse trailer. However, it does take a bit of time to build and wire the meter and display correctly. This is why Dultmeier offers ready-to-go systems. 

The Dultmeier Quick Chem-Mix system (Part number DUCHEM-MIX) is a complete chemical mixing manifold, meter, and display plumbed together on a stainless steel stand. It can be easily incorporated into your nurse trailer or a stationary mixing location.


Dultmeier Quick Chem-Mix Video


There are two separate versions: with inductor assembly and without the inductor assembly. The full unit with venturi inductor (no tank) is ready to go, all you need is to install it on the discharge side of your transfer pump and connect your mini-bulk/shuttle tanks and you are ready to go:


Example of Plumbing for Quick Chem Mix


If you want to use it with an existing cone bottom tank and inductor you already have or use the suction of your pump, use the system without the inductor. You just connect the outlet to the inlet of your pump:


Quick Chem-Mix Less Venturi

Remember that the Quick Chem-Mix units without inductor will require you to plumb a separate freshwater rinse line to the manifold “stack”. 


Quick Chem-Mix Benefits

  • Ability to pull chemicals from 20 feet or more depending on your setup
  • Meter up to six individual chemicals
  • One flowmeter for all products. There is no need to calibrate the meter for each product
  • The rinse feature ensures all product is flushed out of the manifold
  • Easy to plumb into existing inductor cones with minimal plumbing
  • No 12-Volt mini-bulk pumps, just a single transfer pump is needed
  • Available with 2 or 3-inch inductor assembly, also available without inductor assembly if you already have a cone bottom tank with inductor
  • NEMA-rated weatherproof enclosure protects the display 


Testing the Quick Chem-Mix System


More Than One Way to Get the Job Done

There are several effective options for mixing mini-bulk chemicals. The setup you choose depends on your preferences and budget. Whether you assemble it yourself or use the Quick Chem-Mix, this system offers an inexpensive way to conveniently mix multiple products without handling several chemical pumps and hoses. 

If you prefer a more automated system be sure to check out the Dura Auto-Batch System 


Shane Blomendahl, Author

Tech Ag & Industrial Sales

Shane Blomendahl is a tech sales veteran at Dultmeier Sales with over 10+ years of experience in liquid handling products covering several industries and applications.

Learn More About Author

Sprayer Operations: Manual vs Automatic Rate Control

When it comes to sprayers, planters, and other liquid application equipment, choosing between automatic and manual rate control is one major aspect that has a massive impact on the convenience and efficiency of your system. Each option offers advantages depending on your operation's needs, equipment, and budget. This blog will break down the key differences between these systems, how each one works, and the pros and cons of both to help you make an informed choice between the two.


Example of Common Sprayer Controls


What is Rate Control?

At its core, rate control refers to how the system manages the volume of liquid applied per acre. Precise control ensures that chemicals are applied at the correct rate, avoiding under-application that could harm yields or over-application that could waste inputs and increase costs.

All rate control systems fit into two primary categories: manual and automatic control. The fundamental difference lies in how the system adjusts flow rates as ground speed changes. While automatic systems adjust the flow in real-time as you change speed, manual systems require you to adjust flow settings yourself. Let's dive deeper into each approach.


Manual Rate Control: Simplicity at a Lower Cost

Manual systems rely on the operator to adjust the application rate manually, either by changing the pressure in the system with a regulating valve or by controlling the speed of the pump motor/drive. This setup is typically much simpler and budget-friendly but requires more hands-on monitoring and manual adjustment during operation.

manual sprayer rate controller

How Manual Rate Control Works

Manual rate control systems achieve the desired output primarily through two methods: varying pressure with a regulating valve or adjusting the speed of a pump motor/drive. Both approaches require hands-on operation and frequent adjustments to maintain accurate application rates.

The first method involves varying pressure using a manual regulating or bypass valve. In this setup, the operator sets the system’s pressure to match the desired application rate. For example, you might calculate that at 5 mph, 28 PSI is needed to deliver 10 gallons per acre (GPA). However, if your speed increases to 6 mph, you must manually increase the pressure to 33 PSI to maintain the same 10 GPA (these numbers are just examples). This method demands careful pre-calculation of operating pressures for different speeds, along with frequent adjustments throughout the application process.

The second approach involves using a mechanism to adjust the speed of the pump. Two common methods are using a rheostatic control to adjust the RPM of a 12-volt electric pump or a PWM valve to vary the flow of a hydraulic pump. These systems allow the operator to increase or decrease the pump’s speed to control flow rates. 

While the flow can be adjusted in real-time, it still requires manual input based on changes in ground speed. If you speed up, you need to increase the pump RPM to keep the application rate consistent, and if you slow down, you must decrease the RPM to avoid over-application.

For more details, you can examine the manual rate control plumbing diagrams here.


Pros and Cons of Manual Rate Control

Pros:

  • Lower upfront cost: Fewer components mean a more affordable setup.
  • Simplicity: Easier to install and maintain with fewer parts to troubleshoot.
  • Flexible with smaller operations: Suitable for fields where speed changes are minimal or predictable. Best option for skid sprayers or turf sprayers that utilize a spray gun rather than a boom. 

Cons:

  • Labor-intensive: Requires constant monitoring and adjustment, which can be challenging when the operator has multiple things to monitor in the sprayer/tractor cab.
  • Inconsistent applications: Greater risk of  over- or under-application due to human error  
  • Less efficient: Not ideal for operations where speed frequently changes, like irregular terrain or fields with obstacles. Not ideal for prescription applications. 

You can see more information about setting up simple and cost-effective manual rate control in this article about planter fertilizer systems.


Automatic Rate Control: Precision and Convenience

Unlike manual rate control systems where the operator constantly must monitor speed and adjust as best they can to changes in the field, automatic rate control systems take the guesswork out of fertilizer and chemical applications. These systems are designed to automatically adjust flow rates as ground speed changes. This type of control is especially necessary in larger operations requiring maximum efficiency.


automatic rate controller


How Automatic Rate Control Works

Automatic rate control systems rely on sensors, controllers, and flow meters to monitor both ground speed and flow rate in real-time. As the system detects changes in speed—whether from variations in terrain or adjustments made by the operator—it automatically adjusts an electronic regulating valve (or PWM valve/motor) to maintain a consistent application rate, typically measured in gallons per acre (GPA).

These systems remove the need for manual input during the application, which frees up the operator to check for plugged nozzles, monitor wind conditions, and obviously steer. Many automatic rate control systems are integrated with GPS or in-cab monitors to enhance precision further. 

If you want more information then check out our article on the components needed for automatic rate control on a sprayer. 

Pros and Cons of Automatic Rate Control

Pros:

  • Highly accurate applications: Reduces waste and ensures nutrients or chemicals are applied at the correct rate across the entire field.
  • Increased efficiency: Operators can focus on other aspects of operation instead of manually adjusting settings.
  • Ideal for large-scale operations: Handles varying speeds and field conditions seamlessly.

Cons:

  • Higher cost: Advanced components like sensors, monitors, and GPS integration increase the upfront investment.
  • More complex setup: May require professional installation and calibration
  • Potential for downtime: Malfunctioning sensors or controllers can be more difficult to troubleshoot and halt operations until repaired.


Conclusion: Which System is Right for You?

Choosing between manual and automatic rate control depends on the specific needs of your operation. Manual systems offer a cost-effective solution for small farms, acreages, pastures, sports fields, etc. Basically, anywhere you can maintain a fairly constant speed on level terrain. On the other hand, automatic systems are ideal for large-scale or precision farming operations where efficiency and accuracy are paramount, though these systems come with higher upfront costs and more complex maintenance.

No matter which route you choose, Dultmeier Sales can help you identify the system that will meet your needs. Give us a call today and we’ll happily help you determine the best option for your operation.

⇒ Browse the Different Rate Control Options Available At Dultmeier Sales


Shane Blomendahl, Author

Tech Ag & Industrial Sales

Shane Blomendahl is a tech sales veteran at Dultmeier Sales with over 10+ years of experience in liquid handling products covering several industries and applications.

Learn More About Author

(0) Sprayer Pump Breakdown: Understanding the Mechanics & Benefits of Each Type

A sprayer's job is to distribute fluid over a designated area. No matter what type of sprayer at the center of the system is a pump. There are nearly endless different types of sprayers. They are built for several applications and require different types of pumps to deliver the flow characteristics necessary to complete those different spraying tasks.

At Dultmeier Sales, pumps are not just the center of a sprayer, they are at the center of our business. We sell, service, and support a wide variety of pumps for all types of sprayers. In addition, we prioritize understanding the different types, how they operate, and what pump works best on different sprayers.

In this guide, we will look at all the different types of pumps used on sprayers. We will examine how each pump operates and how they compare in terms of flow rate and pressure. In addition, we will offer real examples so you can see exactly how each pump is used. You'll be able to understand what type of sprayer pump will work for your application.

Different Types of Sprayer Pumps

While there are several variations of each type, the different pumps used on sprayers are centrifugal, roller, diaphragm, and piston pumps. Each pump is unique in its design and performance. Let's explore each type to understand how they operate and when to use them.

Centrifugal Pumps

Hypro Hydraulic Driven Centrifugal Sprayer Pump

  • Pump Family: Centrifugal
  • GPM Range: 0 to 500+
  • PSI Range: 0 to 150

Centrifugal pumps use an impeller to move water or other fluids by using centrifugal force. They are known for their ability to move high volumes of liquid at relatively low pressure. The most common centrifugal pump type used on a sprayer is a straight centrifugal pump. Self-priming pumps can be used, but a straight centrifugal pump is typically more efficient and capable of developing higher operating pressure.

A self-priming pump is capped at about 40-60 PSI depending on the specific pump. The straight centrifugal pumps designed for use on sprayers can produce well over 100 PSI. They are intended to accommodate the high travel speeds of self-propelled sprayers combined with the expanded operating ranges of modern sprayer nozzles.

Common Centrifugal Sprayer Pump Applications

  • Agricultural Spraying: Boom sprayers, fertilizer toolbars, boomless sprayers, fertilizer delivery on planters.
  • Turf and Landscape: Golf course sprayers, sports field sprayers, large acreage sprayers.
  • Industrial Uses: Salt brine trucks and trailers, water trucks for dust control.

Advantages of Centrifugal Sprayer Pumps

  • High Volume Output: Centrifugal pumps can handle large volumes of liquid, making them suitable for applications requiring substantial flow rates.
  • Durability: These pumps are robust and can handle abrasive and corrosive chemicals, making them versatile for various spraying tasks.
  • Simplicity: The design is straightforward, which makes maintenance and troubleshooting easier compared to more complex pump types.
  • Cost-Effective: Generally, centrifugal pumps are less expensive to manufacture and maintain, providing a cost-effective solution for many users.

Disadvantages of Centrifugal Sprayer Pumps

  • Low pressure: Centrifugal sprayer pumps have lower pressure capabilities compared to some other types of pumps like piston or diaphragm pumps. While centrifugal pumps can move high volumes of liquid, they do so at relatively low pressures.
  • Cannot Run Dry*: Running a centrifugal pump without fluid can cause significant damage to the pump. A centrifugal pump requires fluid in the pump case to lubricate the seal. *There are lubricated seals or "wet" seal centrifugal pumps that can run dry.

Centrifugal Pump Drive Types

Parts of a Centrifugal Sprayer Pump

Centrifugal Sprayer Pump Parts Breakdown

  • Impeller: The heart of the pump, which is responsible for imparting kinetic energy to the liquid. The design and size of the impeller significantly affect the pump's performance.
  • Casing: Encases the impeller and directs the flow of liquid. It also helps convert kinetic energy into pressure energy.
  • Seal: Prevents leaks and maintains the pump's integrity by keeping the liquid within the system.
  • Suction and Discharge Ports: Inlet and outlet points through which the liquid enters and exits the pump.

You can find a more detailed examination of centrifugal pump components and how they affect the performance of a pump in this guide to centrifugal pumps for fertilizer.

View All Centrifugal Pump Options


Roller Pumps

Hypro 7560C Roller Pump

  • Pump Family: Positive Displacement
  • GPM Range: 2 to 60
  • PSI Range: Up to 300
  • Applications: Small and medium-sized boom sprayers, turf sprayers

Roller pumps use rollers inside a cylindrical housing to move liquid. As the rollers rotate, they create a vacuum that draws liquid in and then pushes it out. Roller pumps are very common on 3-point sprayers crop and turf boom sprayers, because they are self-priming, develop consistent pressure, and are less expensive compared to other types of sprayer pumps.

A roller pump is part of the positive displacement pump family. This means that a consistent volume of fluid is delivered with each cycle (in this case shaft revolution), regardless of the discharge head in the system. Simply put, you can spray at 60 psi if you want because the pump overcomes the restriction in the system. With a centrifugal pump, the system restriction will affect your operating pressure much more.

The larger roller pumps can produce about 50-60 GPM, limiting the size of the sprayer they can be used on. A roller pump can be repaired but the standard cast iron housings do have a limited life span. Friction eventually wears the pump housing to a point where the pump will no longer work efficiently.

To combat the wear and corrosion of agrochemicals and fertilizers, there are Ni-resist and Silvercast pump housings that last much longer than the standard cast iron roller pumps.

Advantages

  • Pressure Output: Capable of producing consistent and generally higher pressure than a centrifugal pump.
  • Self-Priming: Can draw liquid from a lower level, making them easy to start and use.
  • Compact Design: Small and easy to integrate into different spraying systems.
  • Can Be Reversed: Many roller pump models can be reversed so you can drive it either clockwise or counterclockwise. Consult the manual of your specific pump for details.
  • Cost: Less expensive compared to other sprayer pump types. Especially when PTO driven since it does not require an engine or hydraulic motor.

Disadvantages

  • Wear and Tear: Rollers wear out, especially when used with abrasive chemicals.
  • Limited Flow Rate: Not suitable for applications requiring high flow rates.
  • Maintenance: Regular maintenance is required to ensure optimal performance.
  • Limited Lifespan: Wear and corrosion can increase the Internal clearance between the pump housing and rollers to the point that the pump no longer works effectively.

Drive Types

  • PTO
  • Belt Driven
  • Electric Motor
  • Gas-Engine

Parts of a Roller Pump

Roller Sprayer Pump Parts Breakdown

  • Rollers: The moving parts inside the pump that create suction and discharge action.
  • Rotor: Holds the rollers in place and drives their motion.
  • Housing: Encases the rollers and rotor, providing a sealed environment for the liquid to move through.
  • Shaft: Driven by PTO or motor and spins the rotor.
  • Seals: Prevents leaks and maintains the integrity of the pump system.

Check out the Different Roller Pump Options


12-Volt Diaphragm Pumps

2088-343-135 12 Volt Diaphragm Pump

  • Pump Type: Positive Displacement
  • GPM Range: 1 to 5
  • PSI Range: Up to 100+
  • Applications: ATV/UTV sprayers, spot sprayers, small boom sprayers, low-volume chemical transfer

12-volt diaphragm pumps are very common and versatile. They are used on small sprayers because they are easy to power with a battery and relatively low in cost. These pumps work well with a wide variety of agrochemicals, cleaners, and other liquids, especially when diluted. They are self-priming, and they can run dry.

One standout benefit of the 12-volt sprayer pump is the demand switch. This feature shuts the motor off when you close a valve on the discharge side of the pump. When the valve is closed, the pressure increases, tripping the demand switch and shutting off the motor.

The most common application of this is when you are spot-spraying with a trigger wand or spray gun. When you pull the trigger, your pump turns on, when you release the trigger, the pump stops. This conserves your battery life and prolongs the life of the pump as it only runs when needed.

A 12-volt diaphragm pump can be used on smaller boom sprayers. However, they may only be able to work on booms with about 5-10 tips depending on the size of the nozzles that you use.

Advantages

  • Portability: Lightweight and easy to transport, ideal for portable sprayer setups.
  • Self-Priming: Can draw liquid from a lower level, making them easy to start and use.
  • Low Power Consumption: Efficient operation with low electrical power requirements.
  • Chemical Resistance: Can handle a variety of chemicals without damage.
  • Demand Switch: The pump only runs "on demand", when you pull the trigger or open the valve to spray.
  • Low-Cost: Very affordable compared to other pump types.

Disadvantages

  • Limited Flow Rate: Maximum flow rates are about 5 GPM.
  • Pressure Limitations: Maximum pressure is lower compared to other positive displacement pumps.
  • Pump Life: The pump motor and other components do not have the same lifespan as other pump types. Parts can be replaced but the cost and time to repair may be nearly as much as a new pump.

Drive Types

  • 12-volt Electric Motor
  • This pump type is also available with 24-volt and 115-volt motors

Parts of a 12V Diaphragm Sprayer Pump

12 Volt Diaphragm Sprayer Pump Parts Breakdown

  • Diaphragm/Wobble Plate: This assembly is driven by the motor; it has an eccentric bearing that causes it to "wobble" and this motion creates the suction to pull liquid into the pump and force it out.
  • Check Valves: let fluid flow into the pump and stop it from going back out of the inlet port.
  • Pump Housing: Contains the wobble plate and check valve assembly, and serves as the pump chamber where the liquid is pulled into the pump and forced out.
  • Motor: Powers the movement of the wobble plate.

View 12-Volt Pump Options.


Large Diaphragm Pumps

503GR34GCI Large Diaphragm Pumps

  • Pump Type: Positive Displacement
  • GPM Range: 3-100+
  • PSI Range: Up to 725
  • Applications: Tree spraying, turf sprayers, fertilizer applicators

Large diaphragm pumps use multiple diaphragms and chambers to move large volumes of liquid at high pressures. These pumps are the preferred tool for long-range or vertical spraying such as tree spraying. The combination of high-flow rate and high pressures, when combined with the right sprayer gun and nozzle, results in a stream of liquid that can be propelled 50 feet or more in the air.

Video of Diaphragm Pump on Skid Sprayer:

Diaphragm pumps can also be used on boom sprayers or fertilizer boom sprayers. While they don't offer the same flow rates as a centrifugal pump of similar size, they can be a good option for sprayers or applicators when the fluid being sprayed is too thick or viscous for a centrifugal pump.

Advantages

  • High-Pressure Output: Capable of producing very high pressures
  • Durability: The flexibility of the diaphragm offers good resistance to a wide range of abrasive and viscous fluids.
  • Chemical Resistance: Can handle a variety of chemicals without damage.

Disadvantages

  • Cost: More expensive to purchase and maintain compared to smaller pumps.
  • Complexity: More complex design requires more safeguards and proper installation. Troubleshooting can be more complicated than with other pump types.
  • Maintenance: The diaphragms and pump oil must be changed periodically, typically every 500 hours or 3 months of use.

Drive Types

  • Engine Driven
  • Hydraulic Driven

Parts of a Diaphragm Sprayer Pump

  • Diaphragms: Multiple flexible membranes that move to create suction and discharge action.
  • Check Valves: Control the flow of liquid into and out of the pump chambers.
  • Pistons: Push and pull the diaphragms to create the necessary suction and discharge, driven by the crankshaft.
  • Crankshaft: Driven by the engine or motor, rotation of the crankshaft drives the pistons
  • Gear Box: Allows diaphragm pumps to be directly driven by a gas engine at about 3600 rpm.
  • Regulator/Control: Serves as the relief valve and provides pressure adjustment. Also directs flow from the pump outlet to different sprayer features such as spray gun, agitation, etc.

View All Diaphragm Pump Options


Piston Pumps

NGP6055 Piston Pumps

  • Pump Type: Positive Displacement
  • GPM Range: Approx 1 to 68
  • PSI Range: Up to 120
  • Applications: Fertilizer application on toolbars or planters.

A piston pump is more common for fertilizer application than it is for pesticide/herbicide application. They do not offer the flow rates needed for large boom sprayers, and they are not as forgiving to solids or abrasion as diaphragm pumps. However, they excel at delivering fluid accurately and consistently.

This pump works by using pistons to create a reciprocating motion that draws liquid into the pump chamber on the suction stroke and then pushes it out on the discharge stroke. This mechanism allows the pump to generate consistent flow.

There are piston pumps that are designed for high pressures (1000 psi +), but the piston pumps used for agricultural applications are geared to precision. They are often ground-driven, which makes them the simplest option for automatic rate control. A ground-driven piston pump does not require flow meters or regulating valves for automatic rate control. As you speed up or slow down the pump delivers the precise amount needed to maintain your application rate.

These pumps are also available with hydraulic motors and PWM valves. This allows you to control the speed of the pump with a rate controller and flow meter.

Advantages

  • Accuracy: The pump pushes a consistent amount of fluid with each stroke, especially important when applying fertilizers.
  • Durability: Robust construction for long-lasting performance in harsh environments.
  • Priming: Excellent ability to prime offers flexibility when mounting the pump on a sprayer, toolbar, or planter.
  • Easy to Service: The NGP piston pumps are designed to be field repaired. The check valves can be quickly removed and cleaned or replaced as needed.
  • Self-Adjusting: A ground-driven piston pump automatically adjusts to your speed, delivering the precise amount needed without flow meters or regulating valves.

Disadvantages

  • Cost: More expensive than other pump types that deliver similar flow rates
  • Complexity: More complex pumps with many components.
  • No solids: Requires filter prior to the inlet to protect check valves and pistons from damage.

Drive Types

Parts of a Piston Sprayer Pump

The piston pumps used for fertilizer application are more complex pumps than some of the other fertilizer pumps. They feature several components but these are the main ones:

  • Plunger: Reciprocating action of piston rod and plunger draws in liquid and pushes it out.
  • Check Valves: Control the flow of liquid into and out of the cylinders.
  • Crankcase: Houses connecting rod and crankshaft

See all the Piston Pump Drive Options Here


Key Takeaways

The type of pump used on a sprayer can have a drastic effect on the performance. Understanding the different types of sprayer pumps and their attributes will ensure you have the best tool for your application. The Dultmeier Sales team has decades of experience and can provide you with insights and guidance in selecting and troubleshooting your sprayer pump.


Shane Blomendahl, Author

Tech Ag & Industrial Sales

Shane Blomendahl is a tech sales veteran at Dultmeier Sales with over 10+ years of experience in liquid handling products covering several industries and applications.

Learn More About the Author