Corn, or any crop for that matter, requires nutrients to grow. In the pursuit of better yields the need for precise and timely application of these nutrients is almost as crucial as the type of nutrient itself. This typically means applying liquid fertilizer, even at the planting stage.
Accomplishing that requires a liquid delivery system on your planter. Today we are going to look at a variety of system options, explain their pros and cons, and determine what systems are best for a variety of scenarios.
Article Table of Contents - Click to Jump to a Section:
Basic Planter Fertilizer System Overview
For the purposes of this article, when we refer to different types of fertilizer systems, we are talking about the complete collection of equipment and devices used to deliver the liquid fertilizer. Including the pump, controls, hoses, valves, flow meters, etc. These systems vary widely in their complexity from the simpler systems with 12-volt pumps, to the more elaborate automatic systems with electronic flow monitors for each row.
Many Options to Choose From
There are numerous options for each component of a planter fertilizer system because every operation has unique needs based on factors like fertilizer type, equipment, and budget.
Putting a system together requires consideration of these factors and ultimately selecting the components that provide the features you want while remaining easy enough to install and operate.
Fertilizer System Overview
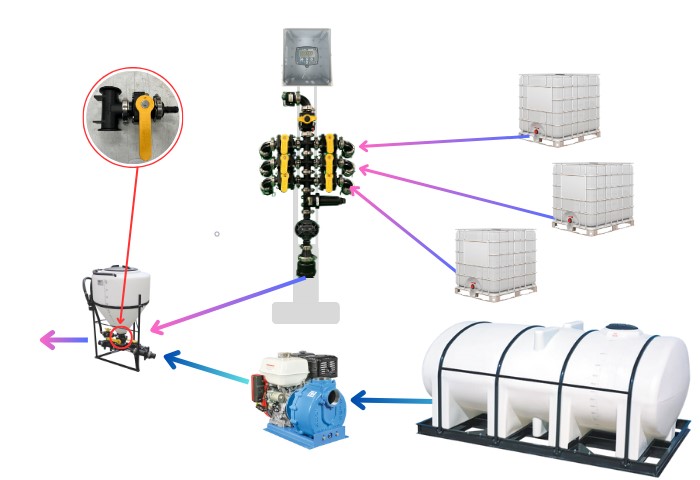
We will get into more details about different types of systems in a moment, but first, let’s look at the basic layout of a fertilizer system. While different fertilizer methods (2X2, in-furrow, etc.) will require some slight variations, these basic components are going to be required in some form.
Fertilizer System Diagram
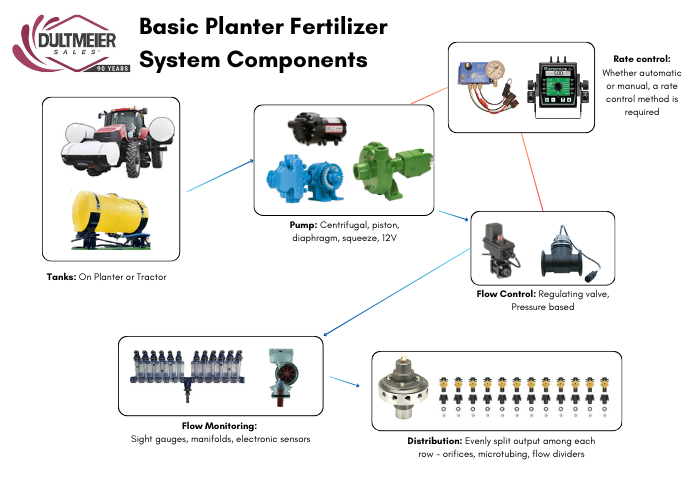
Fertilizer Tanks
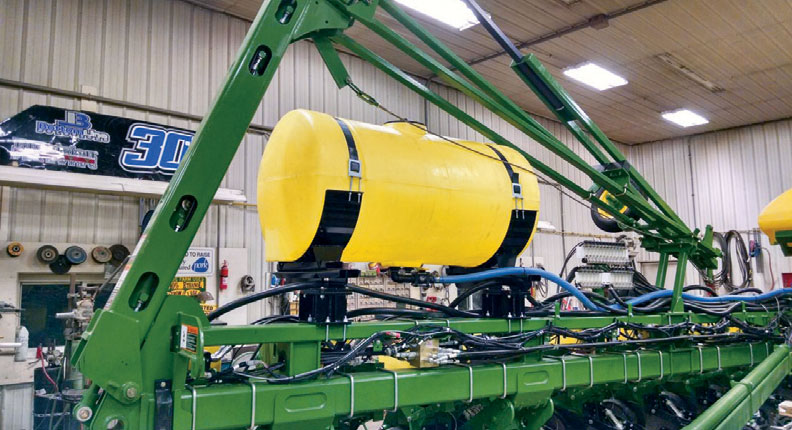
Poly tanks are the go-to option for a wide range of fertilizers, agrochemicals, and soil biologics. Most tanks used in fertilizer delivery systems are either mounted on the planter or the tractor. No matter which setup you prefer, there are kits to accommodate several different planter makes/models as well as saddle tanks and helicopter tanks for tractors.
You can browse the various tank options here:
These kits make it pretty easy to identify a tank or set of tanks that will fit your equipment, but there are dozens of other tank sizes and shapes available if you are looking for something to fit a unique scenario.
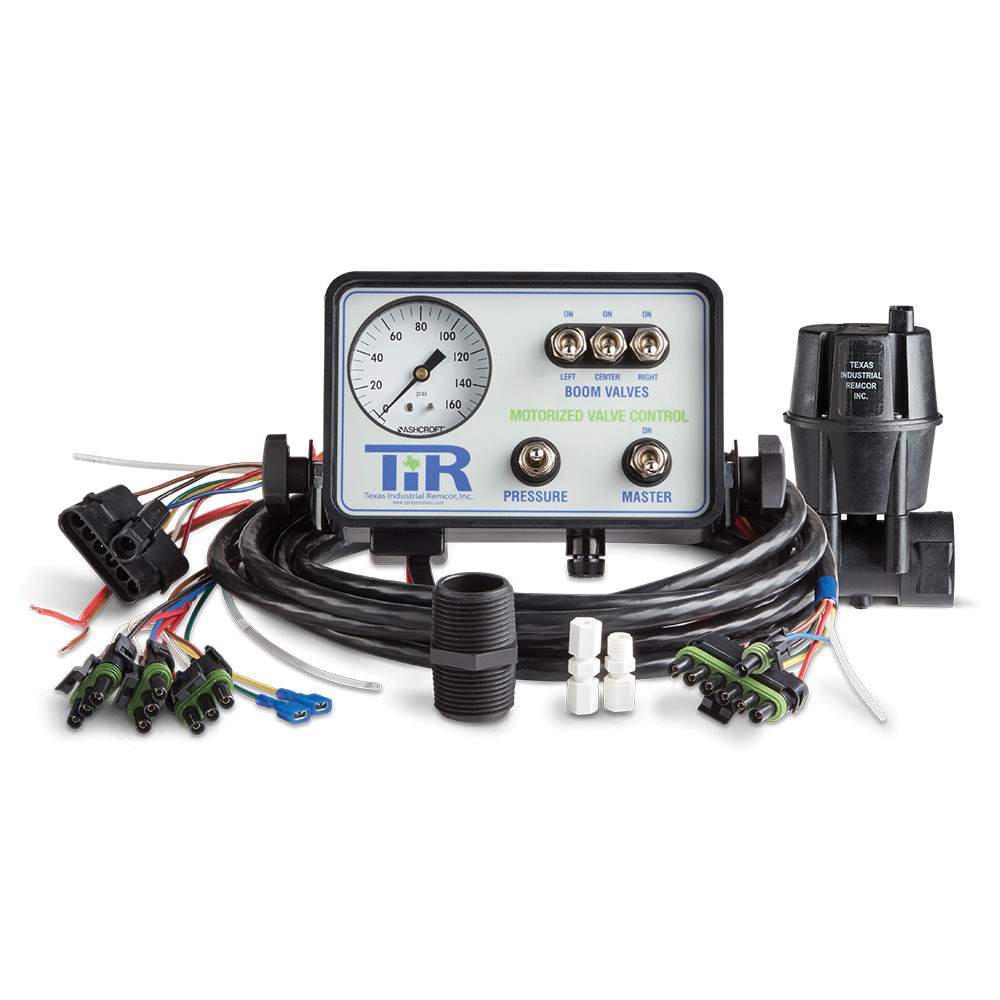
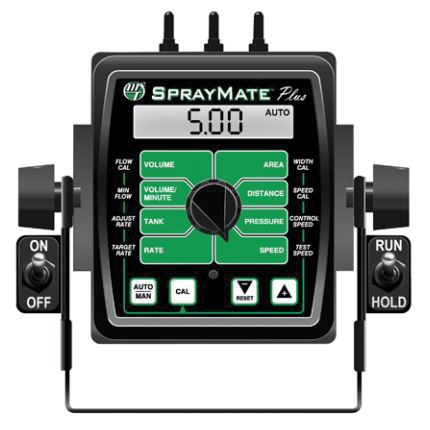
Rate Control
When it comes to controlling the system, there are two primary categories: automatic and manual control. Rate control refers to the mechanism used to change the volume of liquid applied. Simply put, you can opt for a system that automatically adjusts the flow as you speed up or slow down or one that requires you to manually make the adjustment.
Manual rate control systems are generally going to be simpler to use and less expensive. This also means, however, that they lack the convenience of automatic rate control systems. Typically, they do not accommodate prescription applications or data collection as an automatic system might. If you want more information, look at this comparison between auto and manual rate control.
Pump Type
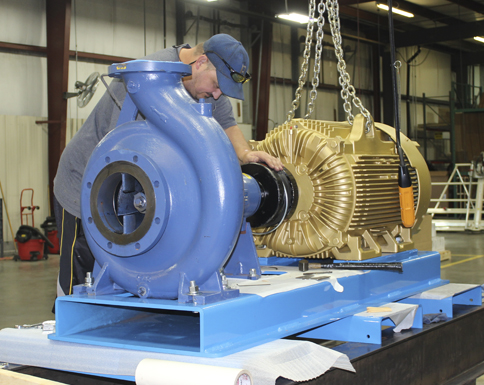
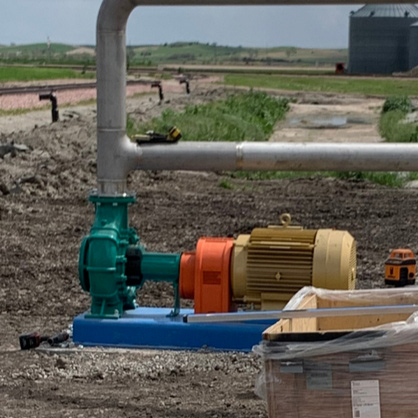
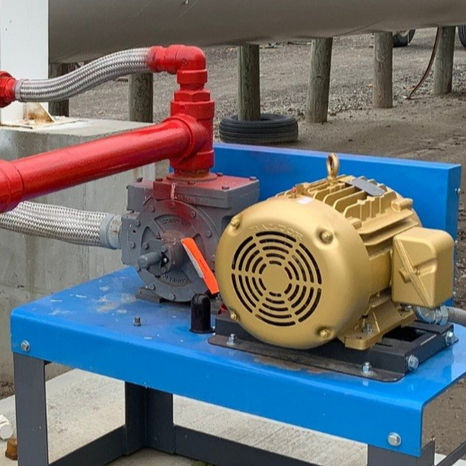
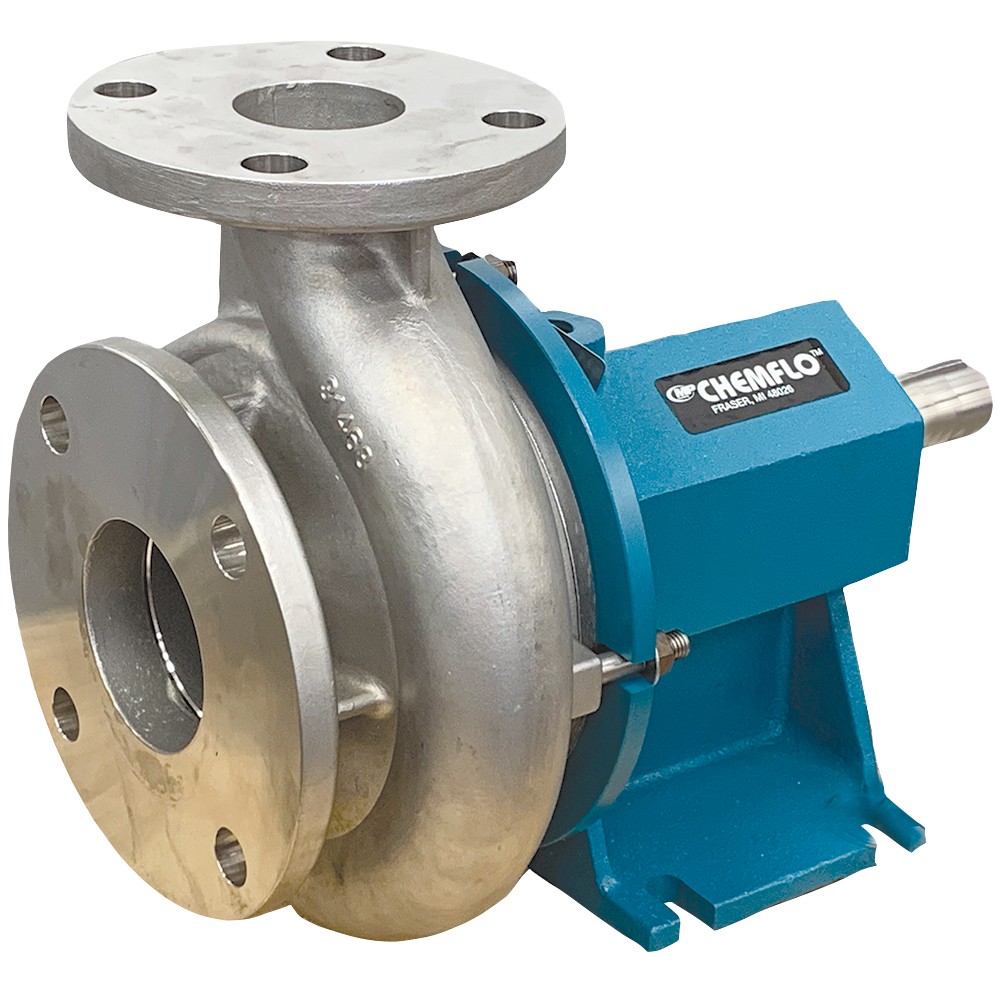
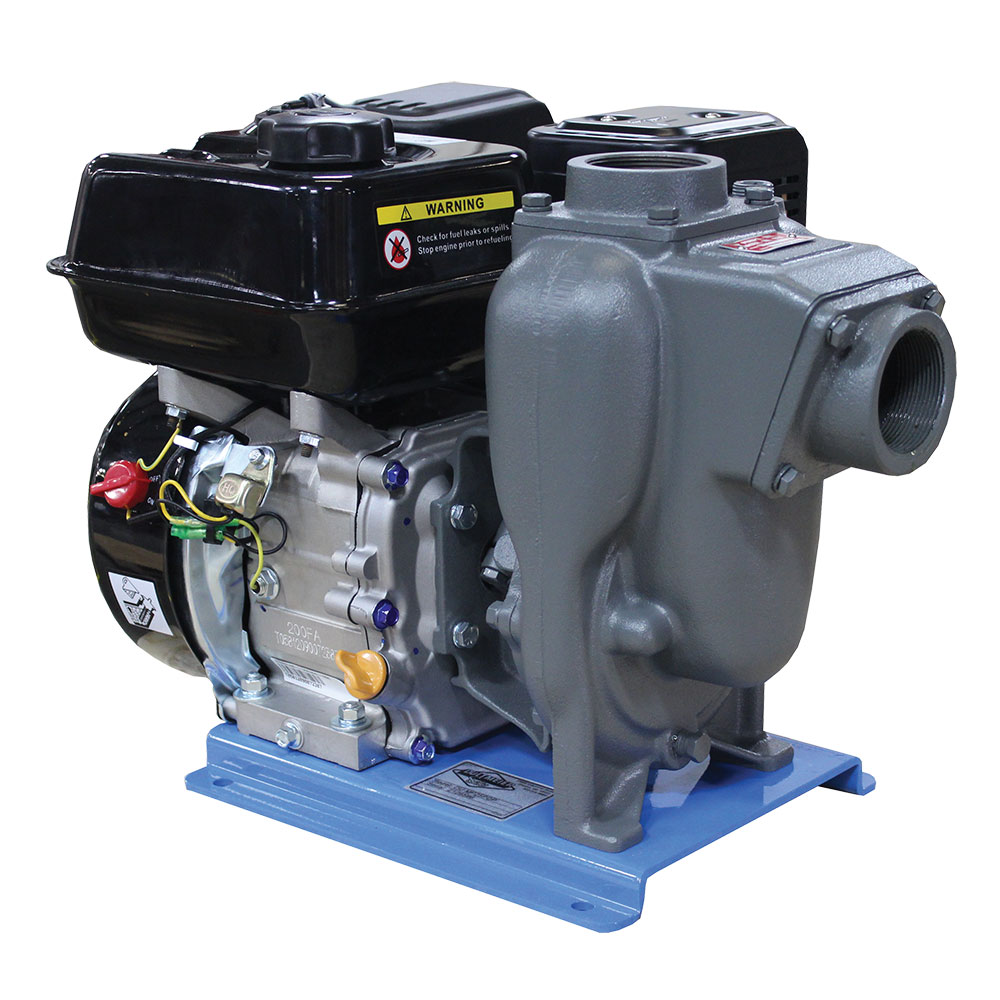
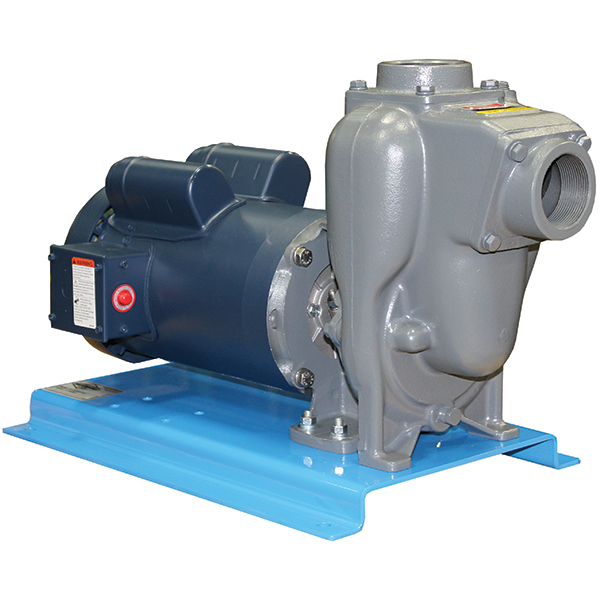
Pump type is another vital aspect to consider, and the main types used for fertilizer application are centrifugal, diaphragm, piston, and squeeze pumps. Here are the pros and cons of using each type:
Pump Type | Pros | Cons |
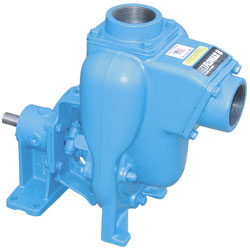
| Centrifugal | High volume, easy maintenance, long service life (especially stainless steel), good for prescriptions | Requires hydraulic outlets, cannot run dry (unless wet seal), more expensive, not self-priming |
| Diaphragm | Handles viscous products, self-priming, can run dry, higher-pressure capability, flexible installation | Lower flow compared to centrifugal pumps, requires a pressure relief valve, and routine maintenance needed |
| Piston | Extremely accurate, durable construction, can prime from longer distances, ground drive models maintain application rate with speed changes | Lower flow rate, not ideal for abrasive products, potential for pulsating flow from piston stroke |
| Squeeze | Simple setup, maintains rate with speed changes, stops when the planter stops, minimal additional components needed | Less versatile, limited pump sizes and row configurations available |
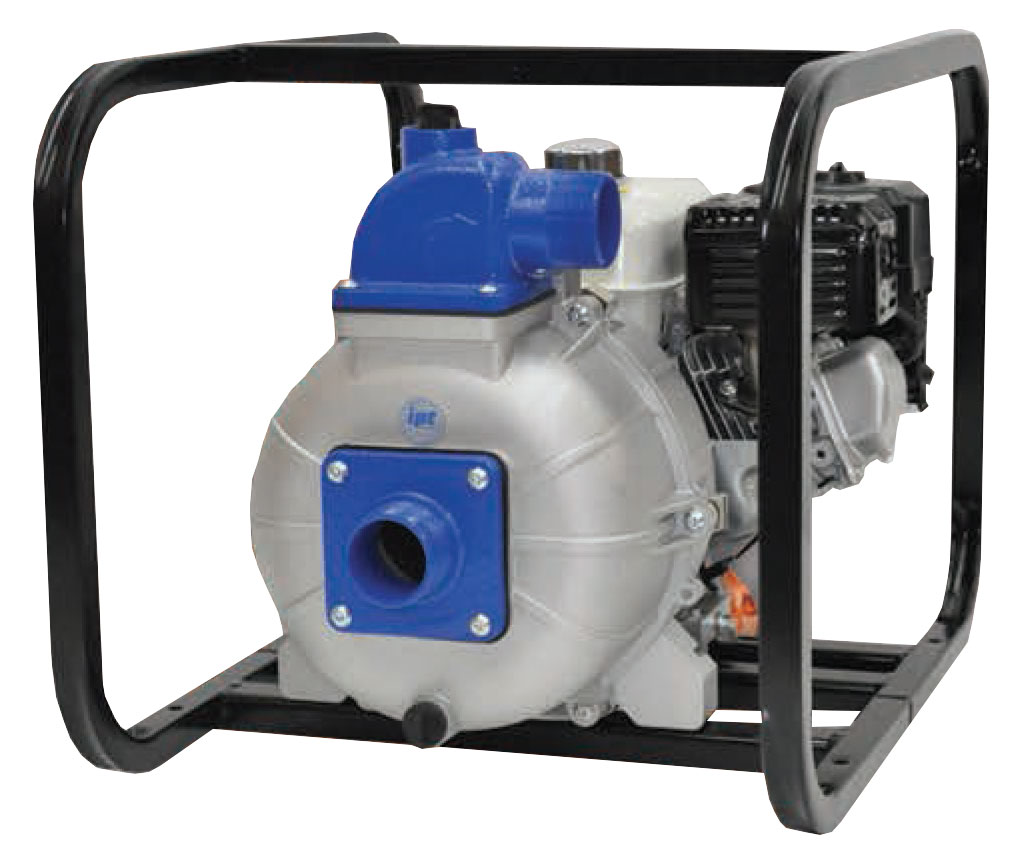
| 12V Diaphragm | Low cost, compact, easy to install, simple to operate, adjustable output with rheostat control | Limited flow rate (3-6 GPM), not suitable for large planters, can overheat with continuous use or rapid stopping and starting |
For more details on each pump type, be sure to read our article about choosing the best fertilizer pump for your planter.
Blockage Monitoring
Monitoring fertilizer applications is essential for efficient application. Accurate flow monitors help to prevent overuse that can harm plants and waste money. Monitoring systems detect clogs early, preventing missed application areas.
Just like with pumps and controls, there are blockage monitoring systems ranging from simple to more complex electronic meters.
“Redball”/”VisaGage” Sight Gauges
The most basic monitoring option is the liquid flow sight gauges also known as “Redball” monitors or “VisaGage” monitors. Several different companies make a version of these tools, but they all function the same.
They consist of a series of clear vertical tubes, each corresponding to a specific row. As liquid flows through the system, colored indicator balls rise in the tubes, showing the flow rate for each row in real-time. If one ball is significantly lower or higher, it signals a potential issue that the operator can address.
Flow monitors like Redball and VisaGage use color-coded balls with specific weights to indicate flow rate ranges. Lighter balls, suitable for low flow rates, require less pressure to lift, while heavier balls are designed for higher flow rates and pressures. Intermediate-weight balls cover medium ranges. The color coding allows operators to quickly and visually confirm the flow rate, simplifying monitoring and eliminating the need for manual measurements.
Every brand offers their version of visual spray monitor variations to work with different pump types and system setups. There are manifold versions and squeeze pump versions, with threaded or push-to-connect ports. You can check out the various options available here:
Electronic Flow Sensors
In some instances, it can be hard to see the balls in the visual monitors due to the dark color of fertilizer or biological product. Unlike traditional visual flow columns, electronic flow monitor systems provide an audible alarm when a row is potentially blocked, ensuring operators can address problems quickly. Several electronic flow monitor systems exist that allow you to monitor all the rows on a console in the cab of the tractor:
CDS-John Blue Liquid Blockage Monitors (LMBS)
John Blue offers blockage monitor sensors that can be added to their visual monitors. These sensors have magnets that sense the ball inside the flow monitor columns, and when a ball drops below the desired range the system gives you a visual and audible indication on a display in the cab.
John Blue offers both a wired version with a simple display panel and a wireless version that can be paired with an iPad. The wireless iPad version provides a visual indication of the ball levels in each monitor while the simpler wired version only provides an indication if there is a block.
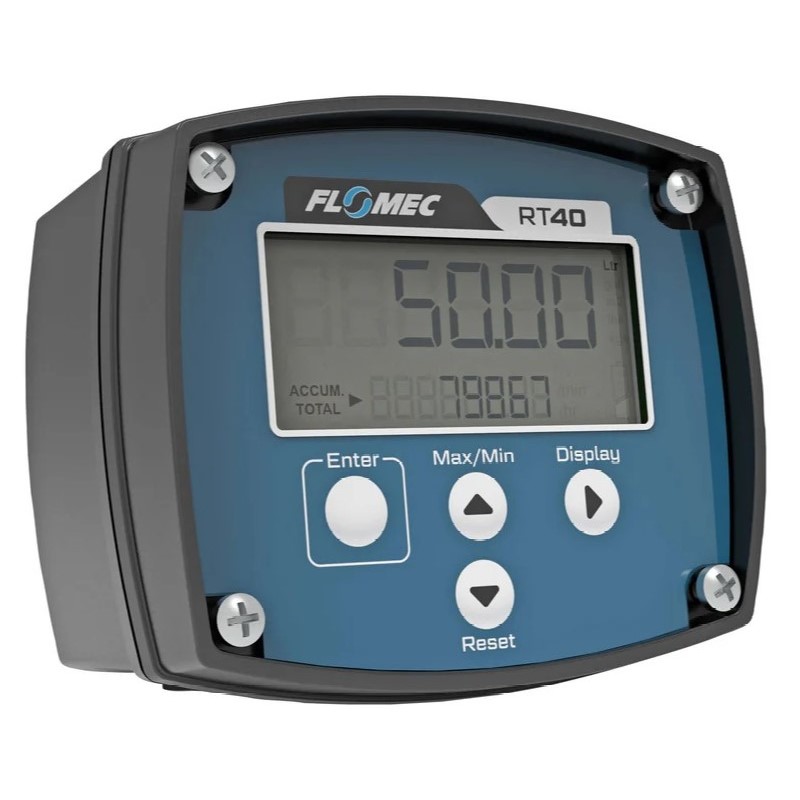
Wilger Electronic Flowmeter (EFM)
The Wilger EFM is an electronic flowmeter which installs in the liquid line of each row. The EFM uses a paddle wheel to measure the flow rate and sends a wireless signal to a tablet in the cab. Both color-coded visual indicators and audible alarms can be set to user preference for near-instantaneous monitoring of each row. The Wilger EFM system can monitor up to 196 separate rows, up to 10 sections, and can be easily retrofitted to your existing visual spray monitors.

Check out the Wilger EFM system here.
Distribution
While major components like the tanks and pump may be the costliest items, your distribution system should not be overlooked. If you do not have the proper method to evenly divide the fertilizer over each row, your ROI will greatly decrease.
Flow dividers, orifices discs, and microtubing are all viable options, but how do you decide which one to use? Well, the type of pump you use will ultimately determine which route you take. Let’s look at the primary methods of flow distribution and when to use them.
Orifices Discs
Orifices are small stainless discs that control the flow rate by restricting the flow of liquid. Orifice discs are a simple and cost-effective distribution method which are typically used in 12V or centrifugal pump systems. They can be used as the nozzle or outlet and “dribble” fertilizer on the ground or installed inline ahead of a fertilizer rebounder or stainless tube.
Orifices can also be installed on the top of the visual flow monitors (Redball). The benefit of this is less components down near the row unit that can get plugged up or potentially damaged.

*Stainless orifice disc and 18999EPR gasket installed in check valve nozzle bodies and cap.
Microtubing
One drawback of using orifice discs is that they are prone to plugging, especially when using products that have suspended solids in them. , on the other hand, provides the same metering ability as an orifice with a larger fluid path, and this larger fluid path reduces the risk of blockages happening.
Different size diameters of tubing correlate to different flow rates (GPM). The tubing acts like an orifice, restricting the flow to deliver certain flow rates at various pressures. The difference is that the inside diameter of the tubing does not need to be as small as an orifice that provides the same relative flow rates because the friction loss of the fluid is extrapolated out over the entire length of tubing. In short, the fluid passes through a wider opening and has less risk of plugging while still delivering the same flow rates.
Microtubing is a great option with soil biologicals and really viscous fertilizers. You can check out the different Identifying the proper size requires doing some math, you can reach out to us for help.
Flow Dividers
A flow divider is a device that splits the liquid that enters it evenly across each outlet. It is not simply a manifold; it is specially designed for even distribution. There is no need for orifices or additional metering as there would be with a basic manifold.
Flow dividers are used with ground-drive piston pumps. The total rate you want to apply per acre is set on the pump. Whatever the incoming flow rate from the pump, the divider splits it up accurately.
Explore John Blue Flow Dividers
Fertilizer Placement
Getting the fertilizer delivered to the desired target is vital. In many cases, the fertilizer is simply dribbled on the ground but there are specific tools for in-furrow/pop-up and 2x2 applications. Totally Tubular stainless steel placement tubes are precision-engineered for several planter models and will allow you to apply fertilizer efficiently.
Planter Fertilizer Setup Examples
12-Volt Pump Fertilizer Systems
Building your planter fertilizer system around a 12V pump is a low-cost, simple option. The basic setup would include the pump, pump speed controller, flow gauges, check valves, and orifice discs. In addition to these pieces, you will also need hose, fittings, zip ties, etc.
Here is what this complete setup looks like:
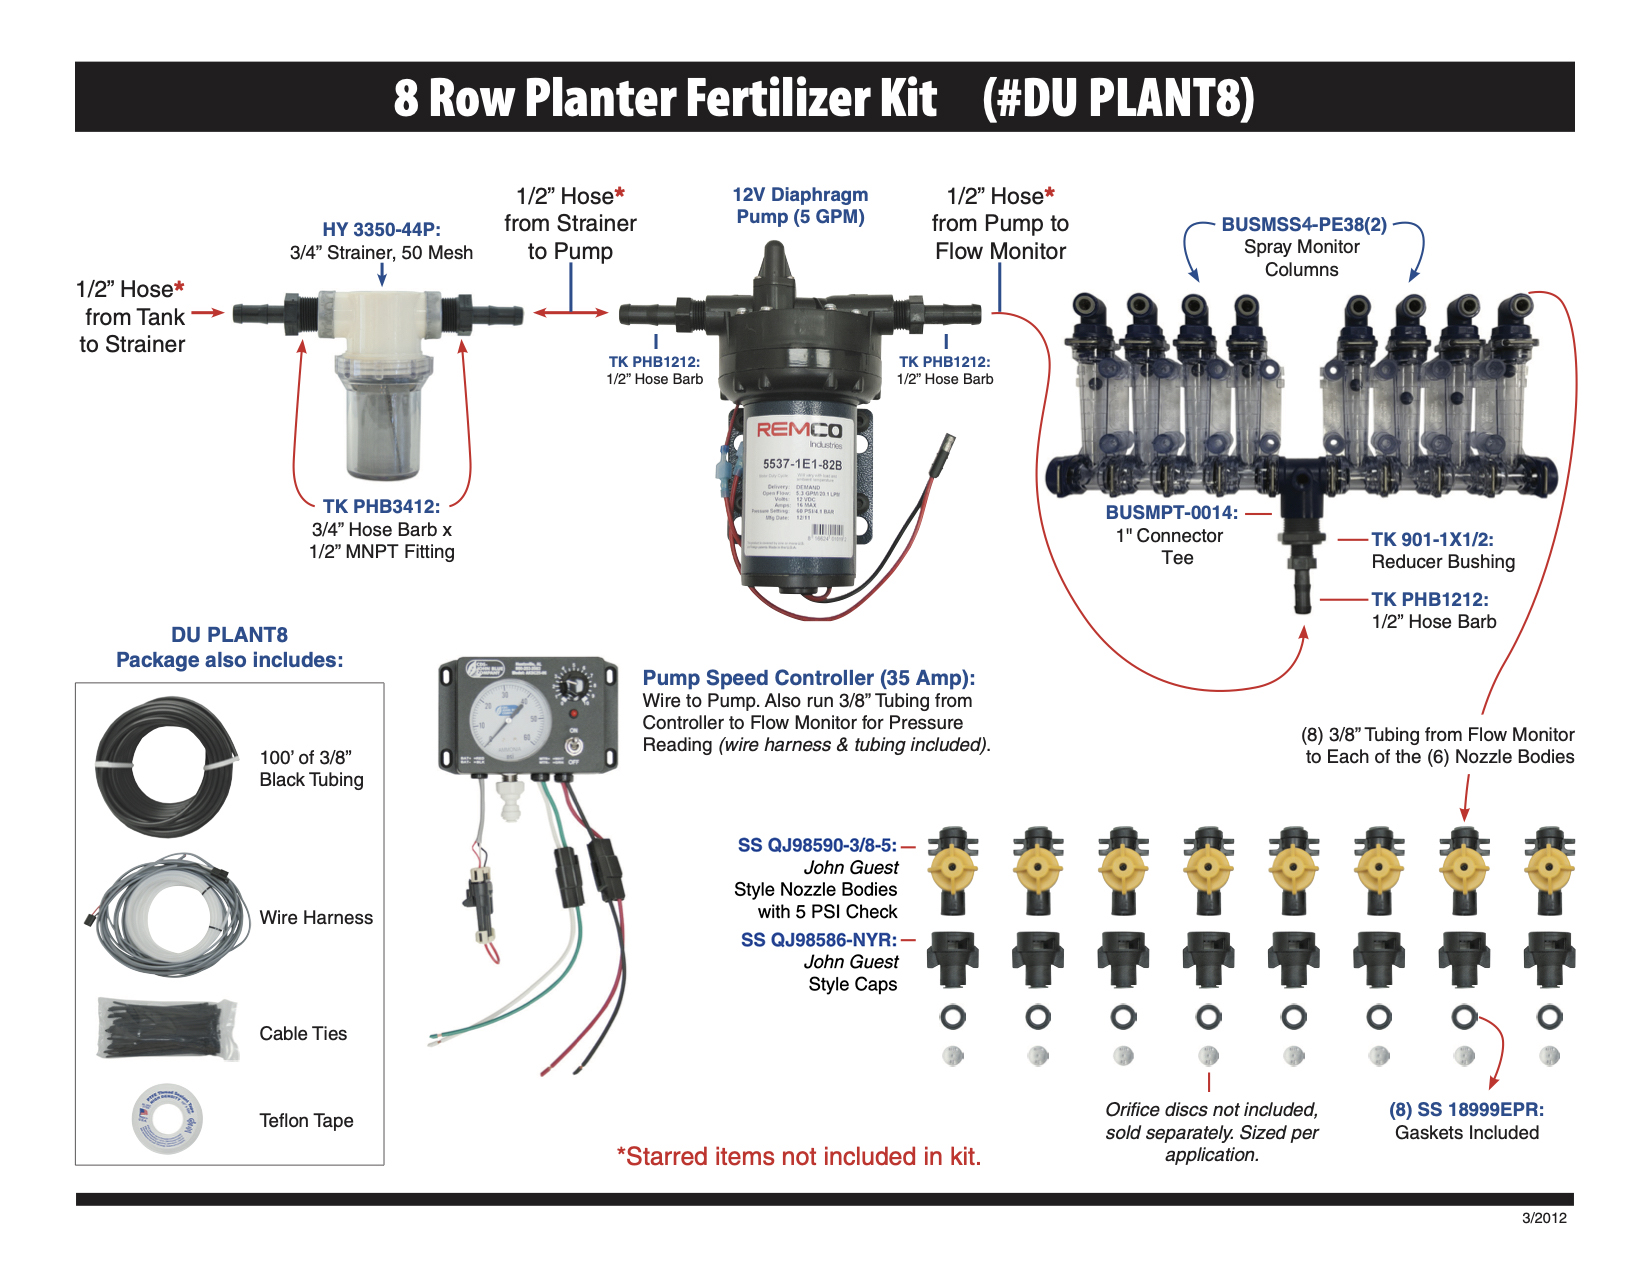
Dultmeier offers pre-boxed kits that contain components for 6-, 8-, 12-, and 16-row planters. These kits can also be customized for drills or planters with any number of rows or dual product placement needs. You can also easily upgrade from the basic sight gauge monitors to electronic flow monitors if desired. You can see all the options
12-Volt Fertilizer Pump System Pros
- Low cost
- Simple to setup
- Simple to troubleshoot
12-Volt Fertilizer Pump System Cons
- 12V pumps not a long-term option as the motors and internals tend to wear out sooner compared to other pump types.
- Rapid pump cycling can lead to overheating
- Limited to about 5 gallons per minute flow rates
A 12-volt pump system will typically be adequate for 5-10 gallons per acre on 12-row planters traveling up to about 5 mph. You can use this GPM calculator to help determine the flow rate you will need from your pump. If you need to apply a rate above 10 GPA or have a planter larger than 12 rows, a centrifugal pump may be the right choice for you.
You can replace the 12-volt pump in the above kit with a hydraulic-driven centrifugal pump and use all the same components except the speed controller. Instead of the speed controller, you will need a rate control console and regulating valve or a rate control console and pump equipped with a PWM motor.
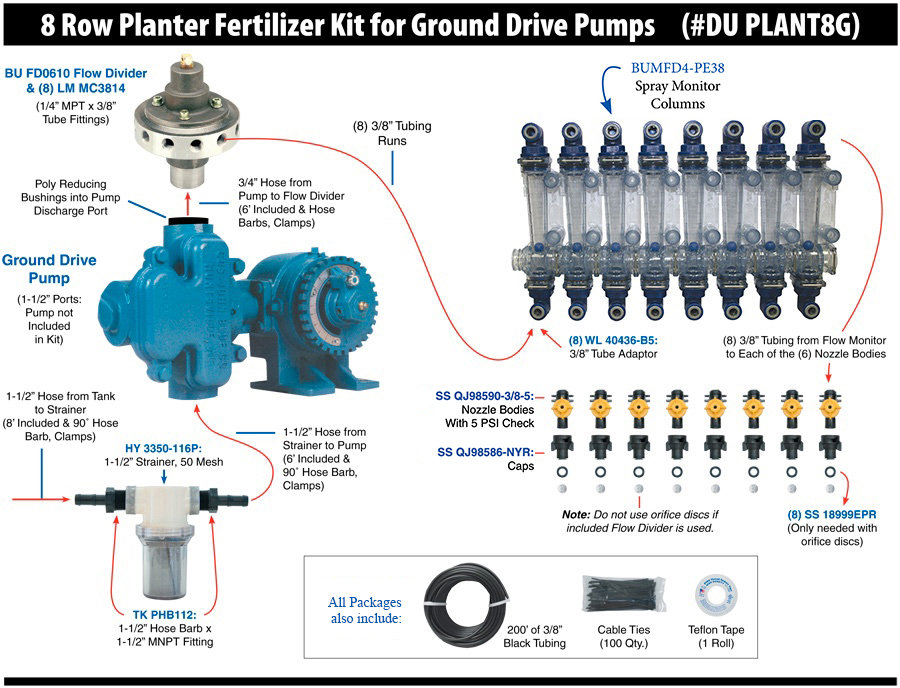
Ground Drive Fertilizer Systems
Another simple planter fertilizer option is to utilize a ground drive pump. It offers automatic rate adjustment because the pump is driven by a planter shaft or ground drive assembly, the speed of the pump changes in direct relation to the speed of the planter. This is accomplished without the need for a rate controller or other electronics.
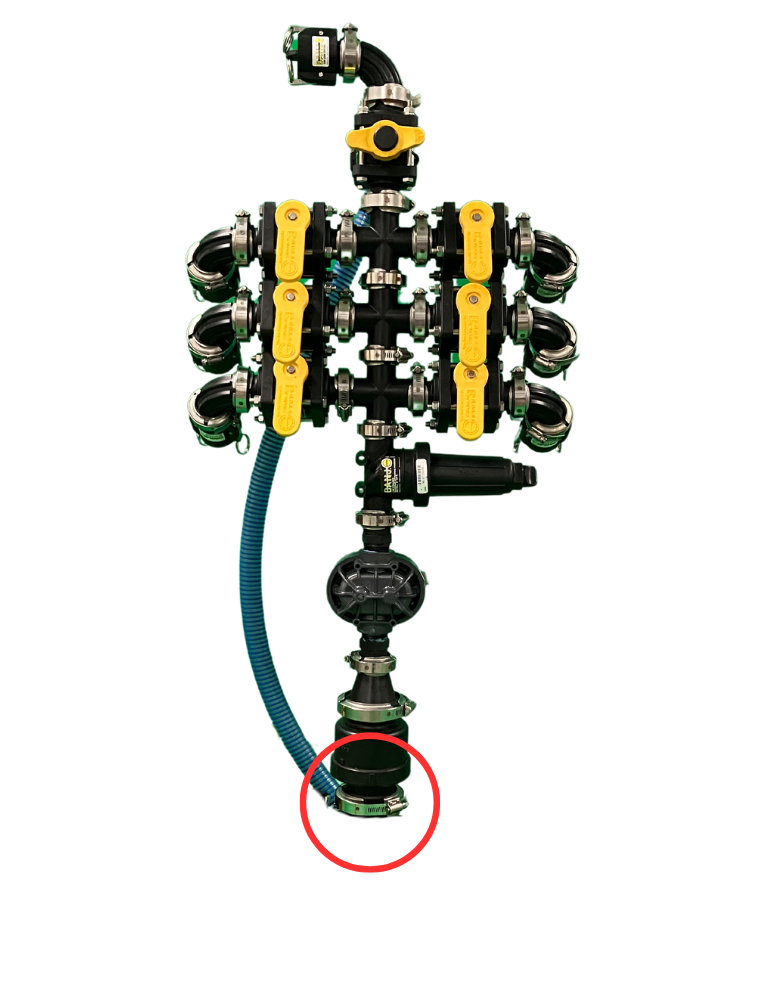
In addition to the pump, the other key components are the flow divider and the spray monitor columns. As mentioned earlier in this article, a flow divider evenly splits the liquid among each row. Because the fluid is already divided, we don’t need the manifold-style flow monitors. Instead “squeeze pump” or independent columns with individual inlets and outlets are used to monitor the flow.
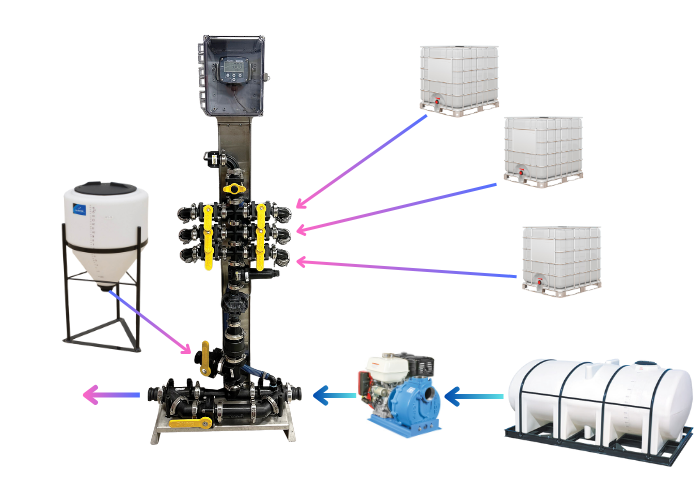
Dultmeier offers all of these components in our “ground drive” planter kits to go along with a John Blue piston pump. The diagram below shows the layout of a ground drive fertilizer setup. Note that with a flow divider, there is no need for orifices downstream.
Ground Drive Fertilizer Pump System Pros
- Simple to setup and troubleshoot
- Higher flow rates than 12V systems
- Automatic rate adjustment without electronics
Ground Drive Fertilizer Pump System Cons
- More expensive pumps
- Gritty products or biologics with suspended solids may damage the pump
Conclusion
Choosing the right planter fertilizer system is crucial for maximizing crop yield and ensuring efficient nutrient application. By understanding the components—tanks, pumps, flow control systems, monitoring tools, and distribution methods—you can tailor a system to your operation’s specific needs, budget, and fertilizer type. The key is ensuring all components work harmoniously for precise and reliable application.
For assistance in selecting or upgrading your system, Dultmeier offers a variety of solutions and expert support to help you achieve your goals.

Tech Ag & Industrial Sales
Shane Blomendahl is a tech sales veteran at Dultmeier Sales with over 10+ years of experience in liquid handling products covering several industries and applications.
Learn More About Author